
Understanding the composition of your soil is important for a number of reasons. It can help you determine what types of plants will thrive in your garden, whether your soil is deficient in certain nutrients, and how to amend it to improve its overall health and productivity. While professional soil testing services can provide detailed and accurate results, there are also several DIY methods that can give you a good idea of what’s going on beneath the surface. In this article, we’ll explore several DIY ways to test soil.
1. Jar Test for Soil Texture
Understanding the texture of your soil – whether it is clay, sandy, or loamy – can give you crucial information about how well it drains and what types of plants it can support.
You’ll need a clean, transparent jar with a tight lid, water, dish soap, and a sample of your soil.
Procedure
- Fill the jar halfway with soil.
- Add water until the jar is nearly full, leaving some space at the top.
- Add a few drops of dish soap.
- Secure the lid tightly and shake vigorously for several minutes to fully disperse the soil particles.
- Leave the jar to settle for several days.
- Observe the layers of sediment. From bottom to top, you will have sand, silt, and clay. The percentage of each gives you an idea of your soil type.
2. pH Test with Vinegar and Baking Soda
This simple test will help you estimate the pH level of your soil. You’ll need vinegar, baking soda, two soil samples, and two clean containers.
Procedure
- Place soil samples in two separate containers.
- In one container, add half a cup of vinegar. If the soil fizzes or bubbles, it is alkaline, with a pH above 7.
- If there’s no reaction, take the second soil sample and mix in half a cup of distilled water to make a slurry. Then add half a cup of baking soda. If it fizzes or bubbles, the soil is acidic, with a pH below 7.
- If there’s no reaction to either test, the soil is neutral, with a pH of around 7.
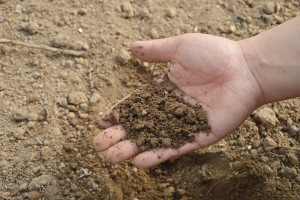
3. Squeeze Test
This is another easy way to gauge the texture of your soil.
Procedure
- Moisten a handful of your soil and then squeeze it in your hand.
- If it forms a tight ball and doesn’t fall apart when you open your hand, you have clay soil.
- If it falls apart as soon as you open your hand, you have sandy soil.
- If it holds its shape but crumbles when you touch it, you have loam, an ideal blend of sand, silt, and clay.
4. DIY Soil Nutrient Tests
While not as precise as laboratory tests, DIY kits can help identify whether your soil is lacking in key nutrients like nitrogen, phosphorous, and potassium. These tests often involve adding a soil sample to a solution and then comparing the resulting color to a chart.
Procedure
- Follow the instructions given on your chosen DIY soil nutrient test kit. Each kit can be slightly different, so it’s crucial to follow the manufacturer’s instructions.
5. Worm Test
Earthworms are good indicators of soil health because they thrive in rich, nutrient-dense soil.
Procedure
- Dig a hole one foot deep and wide in your garden.
- Fill it with compost and cover it back up with the soil you removed.
- Wait a week for worms to discover the compost buffet.
- After a week, carefully dig into the hole and count how many worms are present. More than 10 worms are an indicator of healthy soil. Fewer worms could indicate problems such as soil compaction, lack of organic matter, or pesticide contamination.
While these DIY tests can provide useful information about your soil, they are not as comprehensive or accurate as professional testing. If you have specific concerns about your soil or need detailed information for a particular crop or garden project, consider investing in a professional soil test. Regardless, these DIY methods can give you a greater understanding and appreciation of the foundation of your garden – the soil.